Tampilkan postingan dengan label braid. Tampilkan semua postingan

Jumat, 20 Maret 2015

One-Side Messy Fishtail Braid with Swell Beauty, Laguna Beach


I can't seem to do a fishtail braid right on my own, so I'm glad Dee from Swell Beauty did this pretty fishtail braid to my ombre locks. I love that she started the fishtail at my hair line and swept down the side; and instead of having the end of the braid sticking out, Dee tucked and pinned the ends into the braid. Did you know that I just started blogging for Swell Beauty and you can check out my posts here! But back to this braid, here's what you need to complete the hair style (you will need to know how to fishtail braid):

1 Rubberband (your haircolor)
Bobbypins (your haircolor)
Sexy Hair Big Sexy Hair Volumizing Dry Shampoo 
TigiS Factor Vivacious Hairspray
*You can substitute products with what you already have

Book Hair/Make Up Services with Swell Beauty
1751 S Coast Hwy Laguna Beach, CA 92651
(949) 579-2747
dee@swellbeauty.com

All Tutorial Photographs taken by Shawna of Bleudog Fotography, book her for your next event or to capture a special moment!

1. Spray dry shampoo into your roots and tousle with your fingertips. Section your hair with a wide part. With the wider section of hair, start fishtail french braiding. 2. Finish the fishtail braid and rubberband the end. 3. Go down the braid with your fingertips and gently pull on the sides to create the 'messy' look. 4. Take the end of braid and pin the ends up into the braid with the bobbypins. Spray hairspray all over.

Senin, 16 Maret 2015

Overlapping Half Up/Half Down Braids with Swell Beauty, Laguna Beach


As apart of my braid styling series with Swell Beauty, here's a half up/half down braid style that Swell Beauty owner Dee styled on me. See the other braid style here, how I styled an outfit with this braid hairstyle here, and what you need to complete this braid:

3 hair rubberbands (your hair color)
Bobby Pins (your hair color)
Soft Bristle Brush
Sexy Hair Big Sexy Hair Volumizing Dry Shampoo
TiGi TIGI S-Factor Dream Drops Shine On!
TigiS Factor Vivacious Hairspray
*You can substitute products with what you already have

Book Hair/Make Up Services with Swell Beauty
1751 S Coast Hwy Laguna Beach, CA 92651
(949) 579-2747
dee@swellbeauty.com

All Tutorial Photographs taken by Shawna of Bleudog Fotography, book her for your next event or to capture a special moment!

1. Spray your roots with dry shampoo and work the shampoo into your roots with your finger tips. Take a segment of your hair from the right side and start to french braid. Secure with a rubberband. 2. Take a segment of hair from the left side and french braid. Secure with a rubberband. With your fingertips, pull on the sides of each braid to make them look fuller (below far right). 3. Below the right side braid, grab another segment of hair and french braid parallel to the top braid. Secure with a rubberband. Use your fingertips to gently pull on the sides of the braid to make it look fuller. 4. Take the two right side braids and pull across the back of the head to the left side. Bobby pin under the left braid. Take the left side braid and pull across the back of the head under the two pinned braids. Bobby pin the left braid down, tucking the end of the braid underneath the right side braids and bobby pinning.5. Brush out the un-braided hair with the soft bristle brush, add the Dream Drops to the ends of the hair, and use hair spray all over. You're done!

Jumat, 06 Maret 2015

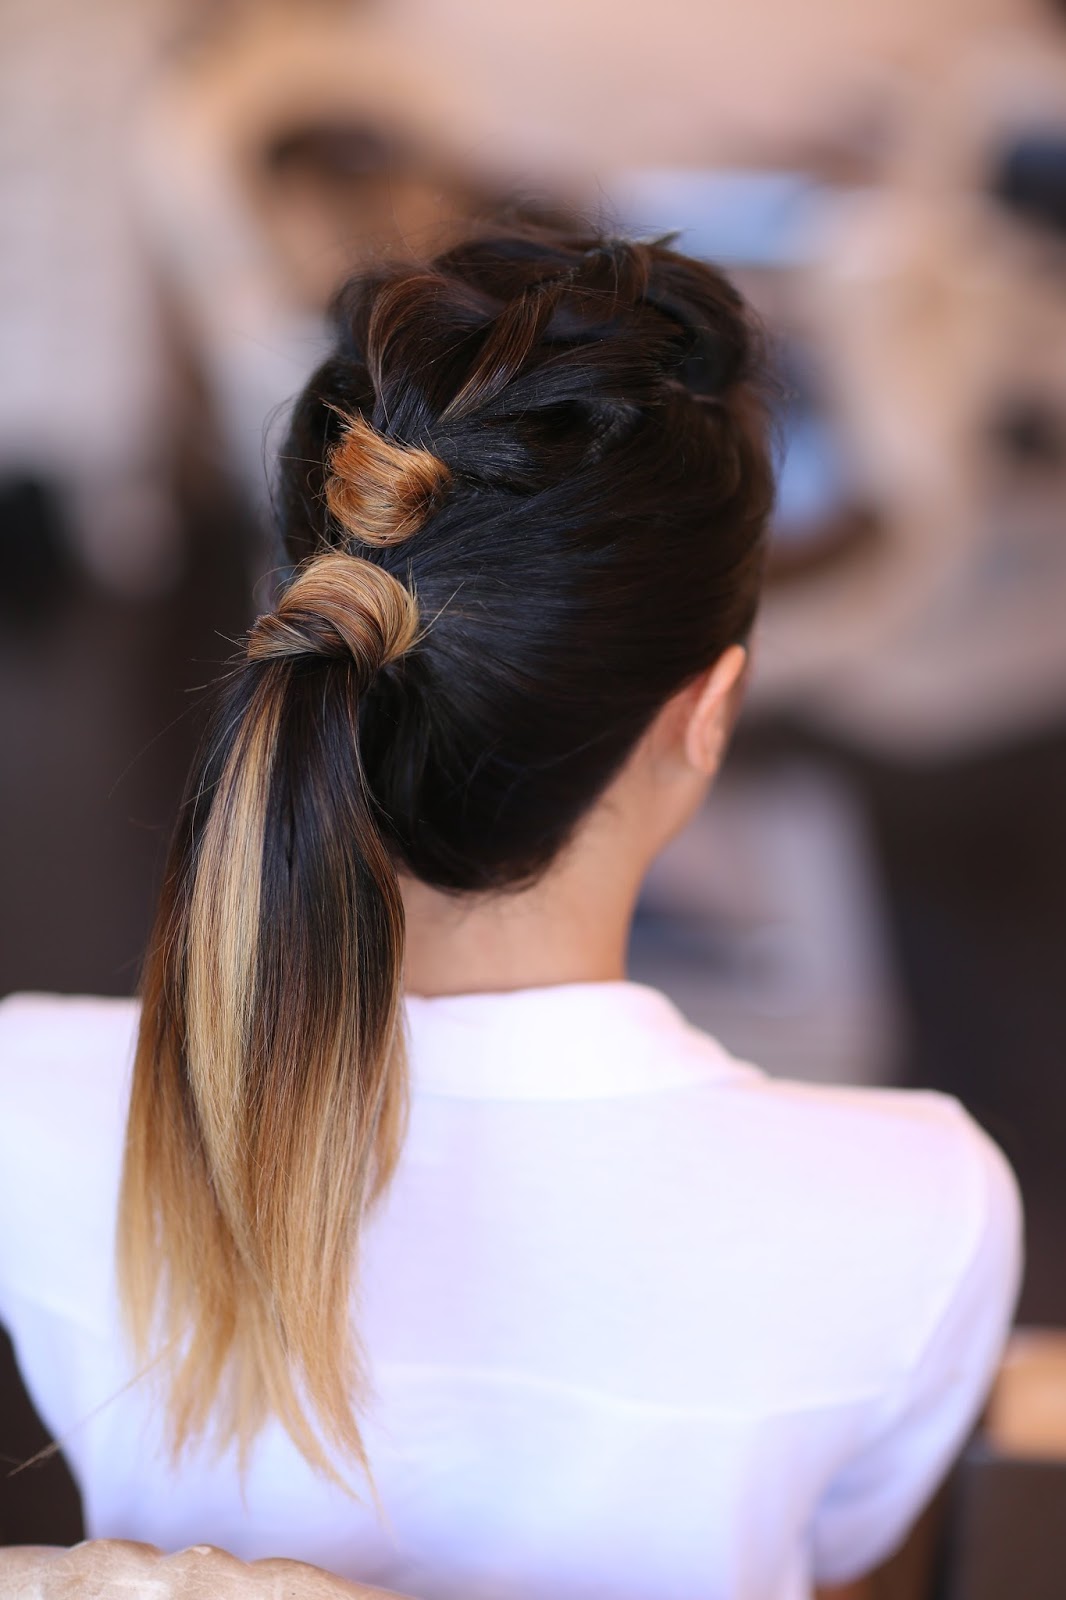
Faux Hawk Braid & Wrap Ponytail with Swell Beauty, Laguna Beach

A 10-Minute Faux Hawk Braid Tutorial
I am a sucker for braid hairstyles and have posted Swell Beauty tutorials for various braids here, here, here and here. This braid hairstyle is fairly simple to execute and had an edgier look so I styled it with a 90's, punk-inspired look which I'll post soon! Here's what you need to create this hair look:

1 Rubberband (Your Haircolor)
1 Hairtie (Your Haircolor)
5 Bobby Pins
Sexy Hair Big Sexy Hair Volumizing Dry Shampoo
TiGi TIGI S-Factor Dream Drops Shine On!
Redken wax blast 10 - high impact finishing spray wax
Tigi Bed Head Headrush
Tigi Bed Head Hard Head Hairspray
*You can substitute products with what you already have

Book Hair/Make Up Services with Swell Beauty
1751 S Coast Hwy Laguna Beach, CA 92651
(949) 579-2747
dee@swellbeauty.com

All Tutorial Photographs taken by Shawna of Bleudog Fotography, book her for your next event or to capture a special moment!

1. Start with dry hair. Pull hair from the top and use the dry shampoo on the roots. Section the sprayed hair into three parts to braid and secure with 1 rubberband at the end of the braid.2. Grab a section of hair from the ponytail and wrap around the rubberband. Secure with bobby pins.3. Grab the rest of your hair and pull into one ponytail with the smaller ponytail and secure with the hair tie.

4.Grab a section of hair from the big ponytail and wrap around the exposed hair tie, pin into place with bobby pins. 5. Use the Redken Wax Spray to tame any flyways, the S Factor Dream Drops for the ponytail hair ends, the Headrush shine spray for overall shine, and the Hard Head hairspray all over to keep the style intact.

Selasa, 30 Desember 2014

Holiday Party Braid Bun Updo with Swell Beauty

Hope you all had an amazing holiday weekend! I just got back from a Christmas Las Vegas trip and I'm very excited to share this Swell Beauty Holiday Braid Bun Up do done by hair/makeup artist Dee; which also goes hand in hand with the Holiday Glitter Beauty Tutorial. This tutorial is perfect for a New Year's Eve look and it's also very simple to achieve.

What You'll Need:
1 Thick Hair Band
6+ Small Elastic Hair Bands (Depending on how much hair you have)
Hair Spray (we used TIGI Bed Head Hard Head)
Dry Shampoo (we used Sexy Hair Big Sexy Hair Volumizing Dry Shampoo)
Spray Wax (we used Redken Wax Blast 10 High Impact Finishing Spray Wax)
50+ Bobby Pins (your hair color)
1 . Spray Clean, Dry Hair & Roots with Dry Shampoo to create good root lift & texture. Used fingers and a brush to disperse the dry shampoo into the hair and roots. 2. Spray hair with spray wax for flexibility in the ends.
3. Gather hair in a high pony tail.
4. Separate hair into 4 to 6 sections.
5. Braid each section and secure with the small elastic band.
6. Loosen each braid until some pieces are falling out.
7. Pin each braid around the ponytail to create a bun-like look.
8. Continue pinning down each braid until the bun is formed.
9. Finish the look by pulling out pieces of each braid to give make a messier bun.
10. Once the bun is formed, spray hair with hair spray to secure the up do style.
Photos taken by Shawna of Bleudog Fotography